How to fill and arrange kitchen shelves


How to fill and arrange kitchen shelves
Whether yours are open, glass-fronted or inside a dresser, chances are you have shelves in your kitchen that are in need of filling. And if you’ve ever wondered how the stylists create such perfectly balanced and yet natural-looking shelf arrangements, read on, because our stylist, Meaghan, is sharing her insider tips.
The art of zoning
Kitchen zoning is something we’ve spoken about before, but if you’re not familiar, it’s essentially just the process of giving each cabinet in your kitchen a specific purpose. That could be a breakfast cupboard where granola, coffee mugs and the toaster live side-by-side, or perhaps a baking area on an island, where you keep jars of flour, measuring scales and baking books within easy reach.
And you can apply the same principles to your open shelving as well. Rather than grouping all your crockery or all your food jars together in one place, spread them around your kitchen’s shelves according to where you’ll actually use them.
So, on open shelving near the kettle, it could be teacups, decorative tins of tea and side plates for cakes and biscuits. Then, over by your stove, it might be your most-used cookery books, dinner plates, soup bowls and jars of dried pasta.
Organising your open shelves by purpose, rather than type of object, like this will make styling them in an eclectic but considered way much easier.
Your tonal and textural palette
While we think it looks best to include a variety of different materials on any single shelf, we’d still advocate for an edited palette of both textures and colours. An example would be white crockery and linens, clear glassware, natural rattan and wood, and brass accents – a palette that includes both hard and soft, refined and rustic textures, and warm and cool colours.
You can then bring more variation and depth through the decorative details, shapes and finishes (aged and polished brass, matt and glossy crockery, plain and bubbled glass…) on each piece, as well as the odd ‘extra’ object (more on that below).
Editing your shelves in this way will help create cohesion, no matter what objects you’re placing on them.
Introduce the (slightly) unexpected
Just like bathrooms, kitchens can very easily become all about the practical. But the key to making them feel as warm and comfortable as any other room in your home is to dress them accordingly.
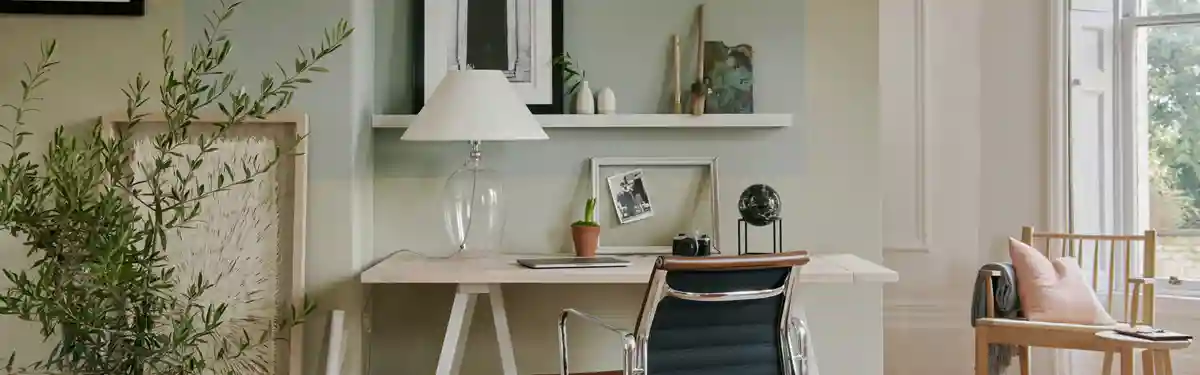
Open shelves are the perfect opportunity to introduce things like paintings, plants, books, decorative ornaments, collected finds (such as shells, pebbles and seed heads) and even table lamps (our wireless Hanover is perfect in this instance).
Children’s pictures, too, will immediately brighten things up and stop your shelves from feeling overly styled, as will postcards. Simply tuck them in amongst your crockery and glassware.
These objects might also be an opportunity to introduce a little accent colour, especially if you prefer to keep your crockery classic and white.
Play with asymmetry
Once you’ve gathered together the objects you’ll be styling your shelf with (although it’s always good to be flexible about this and add or take things away while you’re arranging), it’s time to start actually placing them on the shelves.
While a symmetrical arrangement might be pleasing on the eye, it’s quite traditional – possibly even a little dull. If it’s not quite perfect too, you’ll really notice that something’s off. Better, we think, to go for an asymmetrical but visually balanced look.
If you’re styling a set of shelves, one above the other, an easy way to achieve this is to think in diagonals. Picking out the objects that feel visually strongest (perhaps that’s the white crockery, because the wall behind the shelves is dark, or it could be your cookery books) and place these (or groups of them, more on that to come) diagonally to each other as you progress down the shelves. Then, fill in the spaces left with your other pieces.
On one single shelf, use a similar way of thinking – balancing out the visually ‘stronger’ objects – but laterally instead of diagonally. Perhaps you have quite a large vase at one end. Rather than repeating the same vase at the opposite end in a symmetrical way, balance its size with a group of several smaller objects instead.
And speaking of which…
Group like-items – then mix them up
We always like to create little clusters of objects. So that might be a set of four tumblers, a stack of plates, or a trio of decorative bottles. They don’t have to be the exact same designs, but some similarity works best (those three bottles, for instance, might be different heights and shapes, but be united by the same material). Arranging them in this way means that you won’t have lone – and rather lost-looking – objects floating around, or a disparate display of many individual but unconnected pieces.
That said, we’d also suggest not grouping all your like-items together in one spot. So, say you have six wine glasses and six champagne flutes, break these two sets up and place six on one shelf and six on another (or in different spots of the same shelf). Then do the same with stacks of stoneware bowls and plates in between.
Don’t forget to think about the way you vary heights, as well as types, of things across your display too. Place a horizontal stack of plates beside a vertical group of glasses, or give them more height by adding a bowl or two on top.
Finally, consider how you mix things up along the depth of the shelf as well by slipping in paintings and stood-up plates behind smaller objects.
Spreading materials, shapes and orientations around your shelves will, again, make things more interesting and visually balanced.
For more shelf and surface-styling inspiration, there’s nothing quite like a trip to one of our beautiful stores. You’ll also find our crockery, glassware and other tabletop designs to populate your shelves with in our dining collection.


