How to make paper pinwheel decorations
How to make paper pinwheel decorations
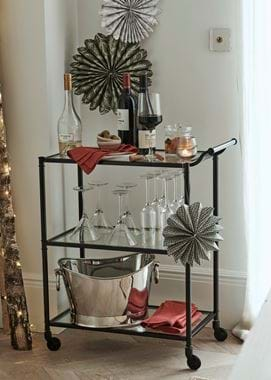
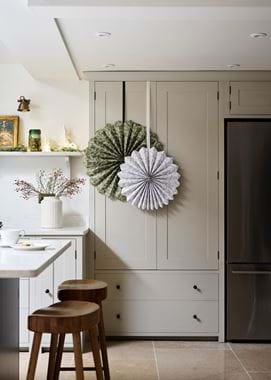
While there’s always a new bauble or ornament on our wishlist each December, nothing quite compares to the satisfaction of making our own decorations. Paper crafts are particularly joyous, being inexpensive, effective and easy once you get into the swing of things (this one especially). So, when we shared these images of our Christmas Day dining room and its pinwheel decorations, it wasn’t much of a surprise when the queries about how to make them came rushing in. Read on for the simple step by step, or visit our Instagram where we’ve shared a video version to make any trickier points clearer.
What you’ll need
Paper
Scissors
Ruler (optional)
String
Stapler and staples
Ribbon
Sticky tape
What to do
- Begin by cutting your chosen paper to size. How big or small you make it is up to you (the width will be roughly the diameter of your finished decoration), but the length should be at least three to four times the width.
You can also choose any paper you like, plain or patterned, just make sure it’s not too flimsy or the folds won’t hold up neatly. We’ve found good quality wrapping paper works well, and it’s a useful way to use up any larger pieces you might have leftover after the presents are done. We’ve used our own collection of wrapping papers in these images, which are still available in our stores (just check ahead before you visit). - Take your paper rectangle and begin folding it into a concertina – if you’re using one-sided patterned paper, place it patterned side down. We’ve made about inch-sized folds in our examples, but you can experiment with different sizes to create more or less folds in the concertina.
- Once you’ve finished folding, flip the paper so the patterned side is facing up. Both ends of the concertina will need to be pointing downwards, so if they’re not, simply trim off the excess fold.
- Fold the concertina back together and then cut each end into a curve, starting from the underside (the non-patterned side) and cutting up and out towards the front face.
- That done, gently fold the concertina in half to find the mid-point. Tie a piece of string here, knotting it at the back, then trim off its tails.
- Open out the concertina to form a half moon shape and, pinching the two sides, staple these together. Start from the centre, stapling close to the edge on the underside. Then, open out the other half of the concertina to create a full circle, and repeat the stapling on this side.
- Cut a length of ribbon – this is what you’ll use to hang your decoration – and stick it to the back of the pinwheel (near the edge) with tape.
- Create as many pinwheels as you’d like – try different sizes and a mix of complementary paper colours and patterns – and then hang them together from a wall, the ceiling or a piece of furniture.
Don’t forget, you’ll find the video tutorial for these pinwheels over on our Instagram.
