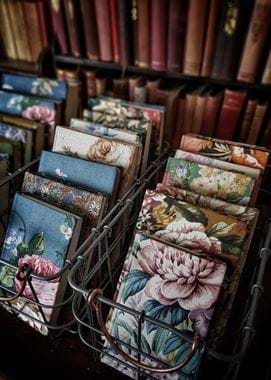
Homemade presents: fabric-covered notebooks
Homemade presents: fabric-covered notebooks
Bookbinder Emma Williams of Forget Me Not Originals transforms second-hand books into family heirlooms by covering them in vintage fabric. She’ll often match patterns to a book’s theme or era (for example, pairing a copy of Daphne du Maurier’s Rebecca with a floral print that conjures up the gardens at Manderley). Here, Emma explains how to cover a notebook or journal as a gift. ‘Make a set of three in coordinating fabrics and tie with twine,’ she suggests. ‘Use recycled-paper notebooks so your gift is completely sustainable, and personalise the front page with a handwritten message and a single pressed bloom tucked into the twine around the cover.’
-
Choose a notebook with a firm softback cover and stitched or stapled binding; and a medium-weight fabric. The stiffer the cover, the heavier the material you can use. I reclaim all my fabrics – I love vintage tablecloths or curtains – as you get a lot for not much money. Remnants are good, too. Don’t forget to allow for excess fabric around the edges of the book.
-
Open the book to the centre and place it as flat as possible on the fabric (lay some newspaper underneath to protect your table). Using a ruler and tailor’s chalk or a pencil, mark a 1.5cm border all the way around the book’s edge. Cut out the fabric rectangle using pinking shears – these create a pretty finish and prevent fraying.
-
Holding the notebook by the pages, apply a thin layer of PVA glue to the outer cover with a paintbrush (I find a 4cm size works best). Place the fabric wrong side up on the table and position the book on top. Then, press the fabric over the cover, working quickly to smooth any wrinkles with your hands.
-
Open the book to the centre. Using small, sharp scissors, make two vertical cuts to the fabric above and below the spine. Stop cutting 2–3mm from the book’s edge, to allow for any adjustments when gluing the inside cover. Next, make four horizontal cuts inwards at each corner, stopping 2–3mm above or below the cover edge. Finally, use the pinking shears to make two diagonal cuts on the top left fabric flap. Repeat for all four top and bottom flaps – each one should be a trapezium shape.
-
Open the front inside cover and, with the paintbrush, apply a thin layer of glue around the edges. Fold the vertical flap of fabric in first, followed by the pinked top and bottom sections. Put some greaseproof paper between the cover and the pages to prevent glue transfer. Do the same with the back cover. Place the finished book under a couple of heavy hardbacks and leave to dry for at least 24 hours.
See more of Emma’s work at forgetmenotbookshop.etsy.com.


